The Reaction Shot Drought: When Your Single-Host Video Feels Like a Lecture
If your one-camera tutorial feels more like a webinar than a conversation, the missing piece may be reaction inserts. Here’s how to use a second-pass reaction shot method to add rhythm, emphasis, and viewer guidance to solo educational videos without a second camera.
By VideoCue · Created with AI assistance and automated editorial checks.
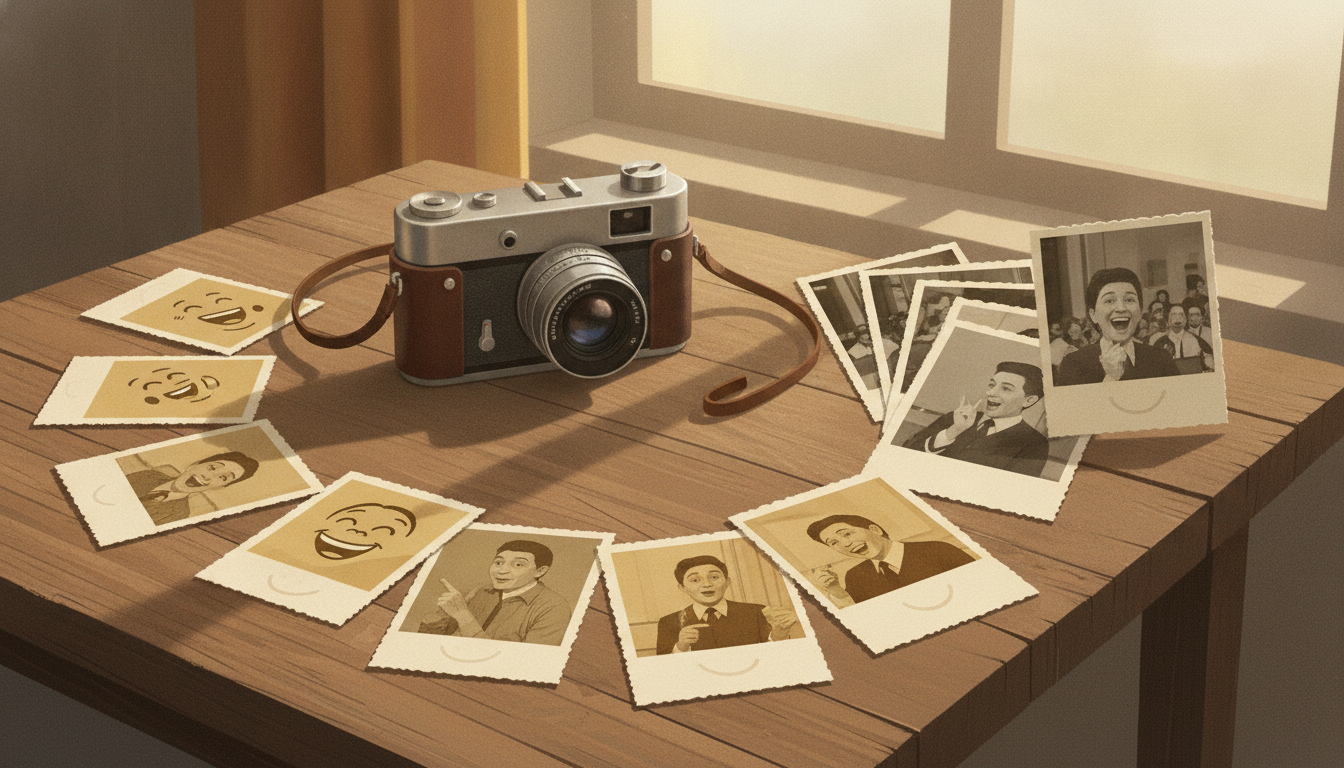
Why solo videos start to feel like lectures
A lot of single-host educational videos have the same hidden problem: the information is solid, the screen recording is useful, the host sounds clear, and yet the whole thing lands with the energy of a webinar replay.
That flatness often gets blamed on pacing, charisma, or a lack of B-roll. Sometimes that’s true. But there’s another issue that’s easy to miss: the edit never shows the host reacting to the material.
A Morphic glossary entry on reaction shots defines a reaction shot as showing a character’s emotional response to an event rather than the event itself, and it notes that reaction shots can provide editorial rhythm. Morphic also says reaction shots and cutaways both cut away from primary action, while serving different purposes. That’s useful language, but it’s still a glossary, not a controlled study or a rulebook.
The stronger foundation here is basic editing theory: meaning changes when you place one shot next to another. Encyclopaedia Britannica’s entry on montage describes montage as organizing separate shots so meaning arises from their relationship. In practical terms, that’s the logic behind stimulus-and-response cutting: show the thing, then show someone receiving it, and the audience reads significance through the sequence.
That principle is well established in film editing. What follows in this article is a practical adaptation for solo educational videos, not an established non-dialogue theory term. In a tutorial, the “stimulus” is the on-screen event. The “response” is a brief insert of you registering what that event means.
That does not mean pretending your software demo is a dramatic scene. It means recognizing that viewers often benefit from seeing not only what happened but how to take it.
In ordinary conversation, meaning doesn’t live only in words. It also lives in the listener’s face: surprise, doubt, approval, caution, relief. When a solo video contains only delivery shots and screen captures, it can lose that back-and-forth rhythm. The result is informative but emotionally monotone.
What’s missing is a manufactured sense of exchange.
Not fake hype. Not thumbnail-face acting. Just a few well-placed moments where the audience sees your response to the material: when something is elegant, risky, annoying, easy to miss, unexpectedly powerful, or finally complete.
What makes this different from ordinary B-roll or face-cam advice
This method is not just “add more B-roll.” B-roll usually illustrates, covers jump cuts, or adds context. A reaction insert does a different job: it frames interpretation.
It’s also not the same as standard reaction content with a face-cam box parked on screen the whole time. In picture-in-picture reaction videos, the viewer watches ongoing live response. Here, the host appears selectively, only at moments where a response clarifies the beat.
And it’s not just generic J-cut/L-cut advice either. J-cuts and L-cuts are transition tools. The new piece here is why you’re using them: to create a stimulus-response rhythm inside a one-host educational edit.
So the point is not “show your face more.” The point is to give a solo tutorial some of the conversational rhythm it lacks by default.
What a reaction shot is doing in a non-dialogue video
In a narrative scene, a reaction shot usually follows dialogue or an event. In a solo educational video, the “event” might be:
- a feature reveal
- a mistake appearing on screen
- a result finally rendering
- a claim that needs a beat of proof
- an unintuitive setting that deserves skepticism
- a comparison that makes one option clearly better
The audience is not just learning what happened on screen. They are also learning how to interpret it.
That distinction matters.
Morphic’s glossary says a reaction shot is specifically about a character’s response, while a cutaway may show contextual information. That’s a helpful framing, but keep it at that level: a helpful framing, not a universal law. For a solo creator, the practical editorial move is simple. You can insert your own reaction not as decoration, but as guidance.
There’s also a looser online-video parallel. TechSmith’s guide to why people watch reaction videos supports a narrow point: audiences watch reactions because they want to see someone experience content and express a perspective. That doesn’t prove tutorials perform better with reaction inserts. It just supports the idea that visible response can be compelling footage in the right format.
From here, the article shifts from source-backed concepts to a creator framework.
A practical six-function framework for solo creators
For single-host explainers and tutorials, reaction inserts can do at least six useful jobs:
- Validation: this part is genuinely useful.
- Warning: this is where people mess up.
- Anticipation: pay attention, the payoff is about to land.
- Surprise: this result is better than expected.
- Skepticism: don’t trust this default blindly.
- Satisfaction: this is the clean end state you were aiming for.
That six-part list is this publication’s framework, not standard film-school terminology.
Used sparingly, these inserts create rhythm. They make the host feel less like a lecturer reading slides and more like someone actively receiving, weighing, and shaping the material with the viewer.
The solo-creator fix: record reaction inserts on a second pass
Here’s the useful part: you do not need a second camera or a co-host.
If you already recorded your main talking-head material and your screen capture, you can create reaction coverage afterward.
The setup is simple:
- use the same camera and lens
- keep roughly the same framing family
- match the broad lighting direction
- place a monitor or laptop just off camera
- play back your screen recording
- perform short, specific reactions to selected beats
- capture them as clean inserts, usually around 2 to 5 seconds each
This is less about acting and more about giving the edit additional grammar.
Think of these inserts as punctuation marks:
- a nod is a period
- a wince is a warning sign
- a lean-in is a drumroll
- an eyebrow raise is a question mark
- a small exhale is closure
The key is specificity. A generic “interested face” is hard to edit. A precise response to a precise moment is much easier to place.
That matters even more in educational content, where exaggerated performance can feel fake fast. Small reactions usually cut better than big ones.
Good reaction inserts tend to be:
- motivated by a visible on-screen event
- short enough not to kill momentum
- different in meaning from one another
- placed sparingly rather than constantly
- timed with audio so they feel predictive or reflective
If you want to map them before shooting, a simple plan in the Storyboard Builder helps you assign each insert a purpose, location, and approximate duration before pickup day.
Fictional worked example: Sam’s 9-minute software tutorial
Sam is a fictional creator making a 9-minute software tutorial. The first rough cut is competent but dull: screen recording for long stretches, occasional host explanation, and no visual sense that Sam is responding to the process.
The audience gets instructions, but not much rhythm.
So Sam does a second pass.
Using the same desk, camera, and lens, Sam places a monitor near the camera and plays the tutorial back. Instead of rerecording the whole piece, Sam captures six short reaction inserts tied to exact moments in the screen demo.
Then Sam intercuts them using L-cuts so the reaction often lands before the key visual reveal on screen. That slight lead cues the viewer that something important is coming. If you want the timing mechanics, see the J-cut and the L-cut.
Here’s a fictional storyboard-style breakdown.
Project: Sam's 9-minute software tutorial
Problem: Rough cut feels like a webinar with no conversational rhythm
Fix: Record six reaction inserts in a second pass, same setup, one camera, monitor added

1) 00:42 - Validation
Reaction insert: Small nod, slight smile
Why Sam chose it: Confirms that the shortcut being introduced is genuinely useful, not filler
Edit note: Bring Sam in about 6-8 frames before the cursor demonstrates the shortcut

2) 01:55 - Warning
Reaction insert: Brief wince, head tilt
Why Sam chose it: Signals a common setup error before viewers repeat it
Edit note: L-cut Sam's line "this is where most people get tripped up" over the reaction insert

3) 03:07 - Anticipation
Reaction insert: Lean forward, eyes track screen
Why Sam chose it: Creates a sense that the next click matters
Edit note: Hold reaction for about 1 second, then cut to the reveal

4) 04:40 - Surprise
Reaction insert: Eyebrows up, quiet impressed look
Why Sam chose it: Marks a feature that works better than expected
Edit note: Let screen-demo audio continue underneath for flow

5) 06:12 - Skepticism
Reaction insert: Narrowed eyes, slight pause before nodding
Why Sam chose it: Shows that the default recommendation needs judgment, not blind trust
Edit note: Cut reaction in before Sam explains the tradeoff

6) 08:31 - Satisfaction
Reaction insert: Relaxed exhale, subtle grin, lean back
Why Sam chose it: Signals completion and payoff after a messy process
Edit note: Use as a release beat before final recap
One mini editing map from Sam’s timeline
Here’s one moment made more operational.
At 01:55, the tutorial reaches a settings screen where a common permissions error appears.
- Timeline order: screen recording wide view → reaction insert of Sam wincing → return to screen recording with cursor highlighting the fix
- Insert duration: about 1.2 to 1.8 seconds
- Audio underneath: Sam’s original narration continues without interruption: “This is where most people get tripped up…”
- Why an L-cut works better than a straight cut: if you hard-cut to Sam only after the error box appears and the narration changes, the insert feels late and decorative. If Sam’s warning line starts on the screen and continues under the reaction insert, the face reads as interpretation, not interruption. The viewer understands both the error and its significance in one beat.
A second useful case is 03:07, where Sam leans forward before a feature reveal.
- Timeline order: screen recording of menu hover → reaction insert of lean-in → reveal click on screen
- Insert duration: roughly 0.8 to 1.2 seconds
- Audio underneath: mouse click ambience or quiet screen-demo audio continues
- Why not a straight cut: a straight cut on the click can feel mechanical. The brief lead-in creates anticipation, which helps the reveal feel earned instead of merely shown.
Now compare the rhythm before and after.
Before: straight instructional delivery
"Open settings, go to automation, enable the rule, and then change the trigger from manual to event-based. After that, choose the output folder and save. If an error appears here, it usually means the permissions are wrong. Then rerun the task and you should see the export complete."
After: same information, but editorially conversational
"Open settings, go to automation—"
[cut to Sam leaning in]
"—because this next switch is the one that actually makes the workflow useful.
Enable the rule, then change the trigger from manual to event-based."
[cut to Sam wincing slightly]
"If you get an error here, don't copy what I did on my first pass. It's usually a permissions issue.
Fix that, rerun the task—"
[cut to Sam watching, eyebrows up]
"—and this is the part I like: the export finishes without the extra cleanup step."
The facts barely changed. The tone did.
Sam is no longer just telling. Sam is receiving, evaluating, cautioning, and rewarding. That’s the conversational rhythm the rough cut was missing.
How to shoot reaction inserts so they actually cut well
The easiest mistake is to think reaction inserts are random face clips you can sprinkle anywhere. They work only when they’re motivated and editable.
1. Mark moments that deserve a human response
Watch your rough cut and flag only the beats that need one of these:
- that matters
- watch out
- wait for it
- that’s better than expected
- be careful with this claim
- that’s the payoff
If every beat gets a reaction, none of them feel important.
For a 6- to 10-minute tutorial, pass if you have roughly 4 to 8 inserts. Fail if reaction shots appear so often that they compete with the instruction.
2. Name the reaction by function, not just emotion
Don’t write “surprised.” Write “surprise at faster export result.”
Don’t write “concerned.” Write “warning before common settings mistake.”
This makes the pickup easier to perform and easier to place later.
3. Keep the eyeline motivated
Your eyes should track the screen as if you are actually watching the event happen. If the eyeline floats, the insert feels decorative instead of connected.
4. Underplay it
Solo educational videos usually benefit from restrained reactions. A slight nod or pause reads as confident. A giant gasp often reads as forced.
5. Capture handles
Start early and hold after the reaction ends. Clean in and out points make these inserts much easier to cut.
6. Cut by audio, not just picture
This is where L-cuts help most. Let spoken setup continue as the reaction appears, or let the reaction arrive a beat before the reveal. If you cut only when the screen changes, the insert can feel pasted on.
7. Use the insert to shape meaning
Ask one question: what does this face teach the viewer about this moment?
If the answer is “not much,” skip it.
If you’re timing narration tightly, a quick pass through the Script Word Counter can help you see whether your spoken setup is too dense to leave room for these beats.
Continuity troubleshooting: fixes for the pickup problems that give the trick away
Matching shirt, light, framing, screen side, and eyeline covers the basics. Here are the failures that usually break the illusion, plus the fastest fixes.
Wrong eyeline
What happens: your eyes point too high, too low, or too far off to the side compared with the implied monitor position.
Fix: raise or lower the playback monitor until your pupils land where the screen should logically be. Before recording all pickups, film a 5-second test of you “watching” and compare it against the original setup. If needed, put a small tape mark near the monitor edge so your gaze stays consistent.
Monitor reflections in glasses
What happens: the insert clearly shows a bright UI or moving playback reflection, which can distract or reveal a different setup.
Fix: reduce monitor brightness, angle the screen slightly away, or lift the monitor a little higher so reflections fall off-axis. If you wear glasses regularly on camera, keep them on for continuity, but adjust the screen angle before you start doing takes.
White-balance mismatch
What happens: the pickup looks cooler, greener, or more magenta than the original footage.
Fix: lock white balance manually instead of leaving it on auto. If the footage is already recorded, correct the pickup first to skin tone, then match exposure and contrast. A tiny mismatch is often survivable; a color temperature jump is not.
Hands entering frame differently between takes
What happens: in one clip your hands are folded, in another they rise into frame mid-reaction, or the reset position changes visibly between inserts.
Fix: define a neutral hand position before each take: on desk, off frame, or lightly on mouse. If the hands must move, give them a motivated action tied to the screen event, like a brief point, small retract, or mouse hover. Random hand motion reads as continuity error faster than facial motion does.
Pitfalls, tradeoffs, and one clear case not to use it
Reaction inserts are useful, but they can go wrong in predictable ways.
Pitfall: overacting
If every insert looks like a thumbnail expression, trust drops.
Fix: keep reactions closer to what a smart colleague would do while reviewing something interesting.
Pitfall: too many inserts
Too much self-reaction can make the video feel self-conscious.
Fix: reserve them for pivots, mistakes, reveals, and payoffs.
Pitfall: no clear stimulus
If the audience can’t tell what caused the reaction, it feels random.
Fix: place the insert right next to a visible event or a line of narration that motivates it.
Tradeoff: pace vs authority
More reaction can make a piece livelier, but too much can reduce the calm authority many tutorial channels rely on.
Use it when: the topic risks feeling dry or overlong.
Use less when: the material is already clear and naturally dynamic.
Tradeoff: intimacy vs efficiency
Reaction inserts make the host feel more present, but they also add edit decisions.
Use it when: you want stronger personality and more conversational rhythm.
Use less when: the video’s main job is fast reference viewing.
A concrete case where not to use it
If you’re cutting a dense troubleshooting segment where the viewer needs to follow five exact settings in sequence to fix a broken export, extra inserts of your face may slow comprehension by pulling attention away from the interface.
In that kind of section, clarity usually matters more than rhythm. Stay on the screen, keep the narration tight, and save reaction inserts for the setup before the fix or the payoff after it works.
Pre-export checklist: pass or fail
Use this as a real final check, not a reflection exercise.
- Pass: no more than 4 to 8 inserts in a 6- to 10-minute tutorial unless the format is intentionally personality-heavy. Fail: reactions appear every few seconds.
- Pass: every insert has a named function: validation, warning, anticipation, surprise, skepticism, or satisfaction. Fail: any insert exists only because there was a visual gap.
- Pass: each insert is adjacent to a visible or narrated stimulus. Fail: the audience would struggle to say what caused the reaction.
- Pass: insert duration stays brief, usually around 0.8 to 2.5 seconds, with only occasional longer holds. Fail: the reaction becomes its own scene.
- Pass: at least 1 to 2 key inserts use an L-cut or J-cut intentionally. Fail: every reaction is hard-cut on picture change.
- Pass: wardrobe, framing, light direction, eyeline, and color match closely enough that pickups don’t announce themselves. Fail: the insert looks obviously shot on another day.
- Pass: the screen remains dominant during dense instructional steps. Fail: reaction inserts interrupt task clarity.
- Pass: each reaction adds interpretation, emphasis, or pacing. Fail: removing the insert would make no difference.
For final packaging, run the title, description, tags, and chapters through the YouTube Metadata Packer so your video presentation is as deliberate as the edit.
Sources and limits
A few scope notes are worth making explicit.
Sam is fictional. The six-function taxonomy in this article is this publication’s practical framework. The article is applying general editing principles and a limited set of reaction-video references to solo educational content; it is not claiming controlled performance results or a formally established theory of non-dialogue tutorial reaction shots.
The source support is also narrow by design:
- Morphic’s reaction-shot glossary supports the basic definition and the idea that reaction shots can contribute to editorial rhythm.
- TechSmith’s reaction-video guide supports only the limited claim that audiences watch reactions to see someone experience content and perspective.
- The montage reference above supports the broader editing bridge: shot order shapes meaning.
That’s enough to justify the technique as a sensible editorial adaptation, but not enough to oversell it as a proven retention hack.
Conclusion: turn delivery into exchange
When a single-host video feels like a lecture, the problem is not always the script. Sometimes the edit simply never creates the feeling of exchange.
That’s what reaction inserts can restore.
The underlying logic is simple: viewers read significance through sequence. In a solo educational video, the screen event becomes the stimulus and your brief insert becomes the response.
So the next time a tutorial feels flat, don’t assume you need more B-roll, more energy, or a whole new setup.
Try this instead:
- finish the rough cut
- mark the 4 to 6 moments that feel most lecture-like
- assign each a reaction function
- shoot those inserts in one second-pass batch
- cut them in with restrained timing and clean continuity
- run the pre-export checklist before publishing
You do not need a second camera.
You do not need a co-host.
You just need to stop treating your face as delivery-only coverage.
Sometimes the missing ingredient in a solo tutorial is not more information.
It’s a visible human response to the information already there.
More from the field
The Comment Archaeology Method: Rewrite Your Next Opening With Audience Language
If your hook sounds accurate but a little distant, comment archaeology gives you a repeatable way to rewrite it with phrases viewers already use. Here’s a practical audience-research method for video scripts, with collection rules, source discipline, bias pitfalls, and a worked fictional example you can copy.
The False Floor: A Practical No-Buy Audio Room Treatment Test for Video Creators
If your voiceover sounds boxy in a bedroom or home office, you do not need to guess your way through foam and blankets. This guide shows a careful, no-buy way to test microphone orientation, closet depth, one movable boundary, and quieter recording windows so you can make the room less obvious on mic.