The False Floor: A Practical No-Buy Audio Room Treatment Test for Video Creators
If your voiceover sounds boxy in a bedroom or home office, you do not need to guess your way through foam and blankets. This guide shows a careful, no-buy way to test microphone orientation, closet depth, one movable boundary, and quieter recording windows so you can make the room less obvious on mic.
By VideoCue · Created with AI assistance and automated editorial checks.
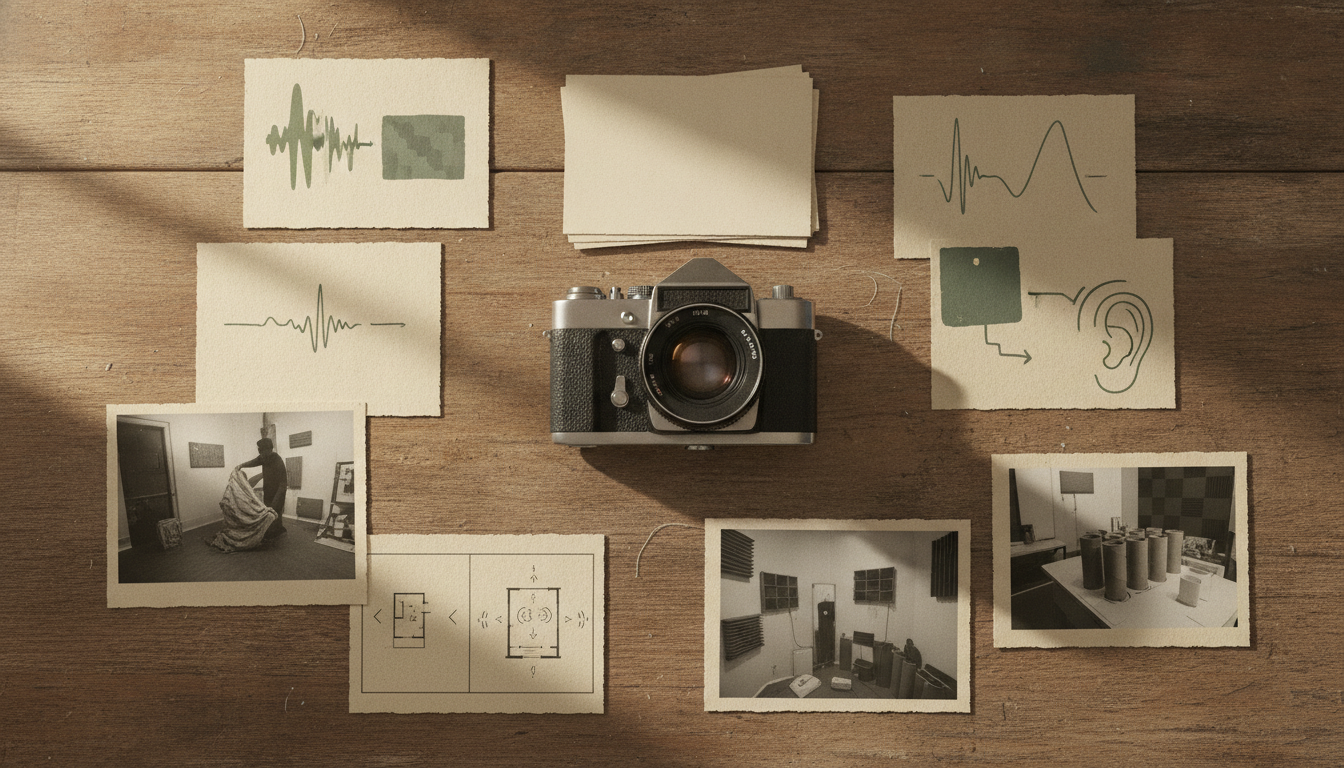
If you record voiceover in a bedroom, office, or mixed-use apartment room, the problem is often not your microphone first. It is that the microphone is hearing a lot of nearby room. Hard surfaces can reflect sound back into the recording, and untreated spaces often add audible echo, reverberation, or a hollow tone that makes video audio feel cheaper than the picture looks (Sound Proof Atlanta on acoustic treatment basics).
That does not mean a closet doorway and an ironing board are secret substitutes for proper treatment. It does mean you can often improve a home recording by changing what the mic points at, what sits near its least-sensitive side, and when you record. This article uses false floor as a practical label for that process: a no-buy experiment that tries to make the room less dominant in the take. It is not a formal acoustics term, and it does not claim measured performance gains.
The goal here is modest on purpose. You are not building true isolation. You are not promising studio acoustics from found objects. You are trying to get a spoken voice that feels less cramped, less obviously reflective, and easier to mix into a normal creator edit.
If you are recording a scripted explainer, it helps to keep the room test repeatable the same way you keep the script repeatable. A simple companion tool for that is VideoCue’s Script Word Counter, which lets you keep your comparison read close in length and pacing from take to take.
What the false-floor idea is really testing
When creators say their audio sounds “small,” they usually are not describing a huge reverb tail. More often, they mean the voice seems pinned to a bedroom wall, desk, window, or corner. Pauses feel busy. Consonants feel splashy. The room appears immediately after the direct voice instead of staying out of the way.
A useful no-buy test breaks that into three separate questions:
- Orientation: Is the mic aimed into the least troublesome part of the room?
- Pattern use: Is the mic’s less-sensitive side or rear pointed toward the noisiest or most reflective area?
- Schedule: Are you recording when the space is naturally calmer?
That is a stronger framework than “add more soft stuff.” Sound Proof Atlanta’s overview is broad, but it correctly separates common acoustic tools by job: absorbers reduce unwanted reflections, and diffusers scatter sound rather than simply soaking it up (Sound Proof Atlanta on types of treatment). A towel on an ironing board is not a calibrated diffuser, so it should not be described that way. At best, it is a movable, irregular surface worth testing because it changes the nearby geometry the mic hears.
The same caution applies to closets. An open closet with hanging clothes may sound better than a bare wall in some rooms, but this article is not claiming a proven psychoacoustic mechanism like “the depth adds low-frequency ambiguity” or “the room sounds larger because early returns changed in a specific way.” Without the promised research sources, the responsible claim is simpler: different orientation and mixed surfaces sometimes reduce how obvious a small room sounds on mic.
A worked A/B test you can actually reproduce
Use one fictional room so the method stays concrete: an 8x10 bedroom with drywall, one window, a desk against the wall, and a closet with hanging clothes. The voice is publishable, but it sounds confined.
The test below is designed so you can copy it without changing six things at once.
Baseline setup
- Mic on stand near the desk
- Closet closed
- Speaker facing the usual recording direction
- Same mic gain, same script, same delivery
- No extra objects moved into place
- Record at your normal time
Test setup A: closet threshold only
- Open the closet doors fully
- Put the microphone just outside the closet threshold, not deep inside
- Stand facing the mic so the closet is behind the mic or slightly off to one side of what the mic “sees,” depending on your room
- Keep the speaker about 4 to 8 inches from a typical dynamic or cardioid voiceover mic, or follow your normal close-mic distance if you already work consistently
- Keep the same script and gain
Test setup B: closet threshold plus movable boundary
- Leave the closet open
- Keep the mic at the threshold
- Put an ironing board or similar tall object behind the mic or off to the rear side, not directly between your mouth and the mic
- Angle it roughly 45 degrees instead of square to the mic
- Drape a towel or blanket over it so the surface is less hard and less uniform
- Keep everything else the same
Pattern prompt: where to point the mic null
This matters most with directional mics. Shure’s microphone basics explain that cardioid patterns are designed to pick up mainly from the front and reject sound from the rear, while supercardioid and hypercardioid patterns narrow the front pickup area and change where the off-axis rejection sits (Shure on microphone polar patterns). If you use a cardioid mic, try pointing its rear toward the most annoying sound or strongest reflective area. If you use a tighter pattern, check the manufacturer’s pickup diagram for where the side and rear sensitivity actually sits before assuming “the back is always the quietest place.”
Because the source list does not include the Audio-Technica spec pages named in the brief, do not overstate a mic-pattern decision beyond that general manufacturer guidance.
Sample comparison script:

"This is take one in the normal desk position.
This is take two with the closet open and the mic at the threshold.
This is take three with the same position plus one angled object near the rear of the mic.
Listen to the pause after each sentence.
Listen to S sounds, T sounds, and the end of the word 'space.'
Choose the version where the room is least distracting, not the one that sounds most unusual."
What to listen for
On playback, ignore whether the take sounds “different” first. Different is not automatically better. Listen for:
- Pauses: does the room jump out right after you stop speaking?
- Consonants: do T, K, S, and CH sounds splash or slap?
- Body of the voice: does it feel natural, or has it become papery and over-dry?
- Background: can you hear traffic, vents, hallway movement, or computer fans more clearly in one position?
Then place the finalists in a real edit. Drop them under the kind of music bed you actually use. If you also use AI or hybrid narration in your workflow, compare against the same style of spoken script you would normally prep for a read, not a special test paragraph. VideoCue’s guide on AI voiceover that doesn't sound AI is useful here because it focuses on speech that reads naturally once recorded.
Why the closet threshold can help, and when it can fail
The closet move is best understood as a position test, not a miracle fix. In some rooms, moving the mic toward a closet opening changes the balance of surfaces around it. A closet with hanging clothes also adds softer, less uniform material than a flat painted wall. That combination can make the room feel less glaring in the recording.
But there are clear failure cases.
Failure case 1: the empty closet
If the closet is mostly empty, full of hard boxes, or lined with flat doors and shelving, it may not help much. In some cases it can sound worse by creating its own narrow reflections. If that happens, close the closet and test a different orientation in the room instead.
Failure case 2: the omnidirectional lav
An omnidirectional lav does not reject the room the way a close cardioid mic often can. If you are clipping on a lav and recording in a hard room, the closet trick may produce very small changes because the mic hears broadly from all directions. In that case, your next move is usually distance control and surface control: get farther from reflective desks and walls, add soft furnishings near the speaker, or switch to a directional mic for voiceover sessions.
Failure case 3: the reflective desk
A glossy desk can be a major offender because it is close and flat. If your baseline setup has the mic low over a hard desk, you may hear more improvement by raising the mic and getting it away from the desktop than by opening any closet. If the desk is the obvious culprit, fix that surface relationship first.
Failure case 4: too far inside the closet
If you move the mic or your head deep into the closet, the take can become dull or shut-in. The useful version is usually near the threshold, where you borrow some alternate geometry without burying the voice in fabric.
The angled object: what it can do, and what it cannot claim
The ironing-board move needs tight language. A towel-covered board is not verified room diffusion. What it does offer is a fast way to test whether one nearby flat reflection path is part of the problem.
Sound Proof Atlanta describes diffusers in general as tools that scatter sound more evenly through a space (Sound Proof Atlanta on diffusers). That supports only a narrow point here: irregular surfaces and non-flat boundaries can behave differently from a bare flat wall. It does not prove that a household object at 45 degrees will create a specific acoustic benefit in your room.
So treat it as an A/B experiment:
- If the angled object makes the room feel less sharp without dulling the voice, keep it.
- If it makes the recording darker, boxier, or oddly muffled, remove it.
- If you cannot hear a reliable difference across multiple takes, stop optimizing that variable.
This is exactly why one movable object is better than five random blankets at once. You can tell what changed.
Scheduling matters, but no decibel claim is being made
A quieter recording window often helps more than creators expect, especially in apartments and shared homes. Sound Proof Atlanta notes that outside noise and equipment noise can interfere with recording quality alongside room reflections (Sound Proof Atlanta on recording interference).
That is enough to justify a scheduling step. It is not enough to claim your HVAC drops by any specific number of decibels at night, and no such benchmark is claimed here.
What you are testing is practical, not laboratory-style:
- Are fewer trucks passing?
- Is the hallway quieter?
- Are neighbors calmer?
- Is the building system less obvious?
If your late recording window helps only because the environment is quieter, that still counts. The conclusion is simply that scheduling solved more than geometry did.
If you want to keep the comparison organized, pull the takes into one timeline, level-match them, and label each clip clearly before listening. If you are building a narrated explainer, VideoCue’s Storyboard Builder can help you keep the same script sections and visual beats attached to each test take so your comparison stays honest.
A simple decision tree with evidence kept in bounds
Because the ideal technical sources promised in the brief are not fully present in the supplied list, this decision tree is intentionally conservative.
Start with mic pattern and nearest surfaces
If your mic is directional, use its front pickup intentionally and aim its least-sensitive area toward the noisiest or most reflective problem zone, following the general manufacturer guidance from Shure on polar patterns (Shure on microphone polar patterns).
If you are on an omni lav, do not expect direction changes alone to save the room.
Choose depth when your current placement is arbitrary
If you only record at the desk because the computer is there, test a doorway, closet threshold, or room rotation first. Position changes often matter more than adding one more soft object.
Choose simple surface control when one offender is obvious
If the desk, window, or one bare wall is clearly creating the harshness, address that first. Broadly, absorptive treatment is used to reduce unwanted reflections (Sound Proof Atlanta on acoustic panels). In a no-buy context, that means testing towels, curtains, furniture, or repositioning against the worst surface first.
Choose an irregular movable boundary when the room is close but still edgy
If the threshold position is better but one edge of the room still sounds too tidy and reflective, test one angled object near the mic’s rear or side.
Choose schedule when the room is acceptable but noise ruins it
If the tonal character is fine and the real problem is intermittent noise, stop rearranging the room and change your recording window.
Pitfalls, tradeoffs, and what to do next
The biggest mistake is confusing less reflection with better voice. A room can become dull before it becomes clear.
Pitfall: only scheduling helped
If the room still sounds boxy but the quiet hour reduced interruptions, keep the schedule and revisit placement later. Your next test should be mic orientation and desk distance, not more random fabric.
Pitfall: the closet helped but the result is too dry
Pull back from the threshold slightly, or open the setup to include a little more of the room. You want less obvious room, not zero life.
Pitfall: the angled object dulled the voice
Remove it or move it farther from the mic. If the benefit disappears once it is farther away, that object probably is not worth keeping in your routine.
Pitfall: the room improved, but the edit still feels weak
At that point, the problem may be script pacing, not acoustics. Tighten the spoken copy before chasing tiny room changes.
Short checklist for your next session
- Record one honest baseline first.
- Keep the same script, gain, and speaking distance.
- Test the closet threshold, not the deep closet.
- Point the mic’s least-sensitive area toward the biggest problem zone when using a directional mic.
- Raise the mic away from a reflective desk if needed.
- Add only one angled object at a time.
- Compare during your normal hour and your quietest routine hour.
- Listen for pauses, consonants, and dullness.
- Save a photo and notes of the winning setup.
Conclusion: make a repeatable decision, not a myth
The most useful version of the false-floor idea is not “hack your room into a studio.” It is “run a careful no-buy test before you buy things.” For many video creators, the win is simply that the room becomes less obvious, the background feels calmer, and the voice sits into the edit with less cleanup.
If your test shows that only scheduling helped, lock in that recording window first. If the closet helped but sounds too dry, move slightly back toward the room. If the angled object helped, keep it only if you can place it the same way every session. If none of the above helped, your next best move is usually a more directional mic technique, better distance from reflective surfaces, or actual treatment rather than more household improvisation.
That is still progress. You are no longer guessing.
Metadata check against house limits: this title is within the required 20-180 characters, the excerpt is within 60-500, the meta title is within 20-70, and the meta description is within 70-170.
More from the field
The Reaction Shot Drought: When Your Single-Host Video Feels Like a Lecture
If your one-camera tutorial feels more like a webinar than a conversation, the missing piece may be reaction inserts. Here’s how to use a second-pass reaction shot method to add rhythm, emphasis, and viewer guidance to solo educational videos without a second camera.
The Comment Archaeology Method: Rewrite Your Next Opening With Audience Language
If your hook sounds accurate but a little distant, comment archaeology gives you a repeatable way to rewrite it with phrases viewers already use. Here’s a practical audience-research method for video scripts, with collection rules, source discipline, bias pitfalls, and a worked fictional example you can copy.